Showing posts with label Tricks. Show all posts

Sunday, 11 August 2024

10 steps to use chris titus tool in windows

 Chris Titus Tech's tool, known as "Titus Tool," is a script designed to debloat, optimize, and manage Windows settings efficiently. Here’s a step-by-step guide on how to use it:


### **Step 1: Download the Script**

1. Open a web browser and visit Chris Titus Tech's GitHub repository for the tool.

2. Download the latest version of the script. The repository is usually found at [ChrisTitusTech/Win10Script](https://github.com/ChrisTitusTech/win10script).


### **Step 2: Extract the Script**

1. If the script is downloaded as a zip file, extract it to a folder on your computer.


### **Step 3: Open PowerShell**

1. Right-click on the **Start Menu** and select **Windows PowerShell (Admin)**. This opens PowerShell with administrative privileges, which is required to run the script.


### **Step 4: Set Execution Policy**

1. Run the command:

   ```powershell

   Set-ExecutionPolicy Unrestricted -Scope Process

   ```

   This allows the script to run on your system.


### **Step 5: Navigate to the Script Folder**

1. Use the `cd` command to navigate to the folder where you extracted the script. For example:

   ```powershell

   cd C:\Path\To\Script

   ```


### **Step 6: Run the Script**

1. To execute the script, type:

   ```powershell

   .\win10debloat.ps1

   ```

   The script will start running, and a menu will appear with various options.


### **Step 7: Choose Desired Options**

1. The script will present you with a menu of options such as "Debloat Windows 10," "Remove OneDrive," "Change Privacy Settings," and more.

2. Select the desired options by typing the corresponding number or letter.


### **Step 8: Follow On-Screen Prompts**

1. Some options may require further input or confirmation. Follow the on-screen prompts to complete each action.


### **Step 9: Restart Your Computer**

1. After the script completes, it’s recommended to restart your computer to apply all changes.


### **Step 10: Review Changes**

1. After the reboot, review your system to ensure that all desired changes have been applied. You may need to tweak additional settings manually if necessary.


By following these steps, you can effectively use Chris Titus Tech's tool to optimize your Windows system.

Friday, 22 March 2024

10 Genius Computer Tips & Tricks You Need to Know Right Now!

 Are you ready to become a computer whiz? Whether you're a seasoned tech guru or just getting started with computers, these 10 tips and tricks will revolutionize the way you use your device. From speeding up your system to mastering keyboard shortcuts, we've got you covered. Let's dive in!


1. **Speed Up Your Startup**: Tired of waiting for your computer to boot up? Try disabling unnecessary startup programs. On Windows, open Task Manager (Ctrl + Shift + Esc), navigate to the Startup tab, and disable programs you don't need running at startup. On Mac, go to System Preferences > Users & Groups > Login Items to manage startup apps.


2. **Master Keyboard Shortcuts**: Save time and impress your friends by mastering keyboard shortcuts. Learn common shortcuts like Ctrl + C (copy), Ctrl + V (paste), and Alt + Tab (switch between open applications). Explore advanced shortcuts for tasks like taking screenshots, opening new tabs, and navigating windows.


3. **Customize Your Desktop**: Personalize your desktop to reflect your style and workflow. Organize icons into folders, change your wallpaper, and customize your taskbar or dock. On Windows, right-click the desktop and select Personalize. On Mac, go to System Preferences > Desktop & Screen Saver.


4. **Backup Your Data**: Don't risk losing precious files and photos. Set up automatic backups to keep your data safe. Use built-in backup tools like Windows Backup or Time Machine on Mac. Alternatively, consider cloud storage options like Google Drive, Dropbox, or iCloud for seamless backup and access.


5. **Declutter Your Hard Drive**: Is your computer running out of storage space? Clear out junk files and uninstall unused programs to free up disk space. Use disk cleanup tools like Disk Cleanup on Windows or Disk Utility on Mac to remove unnecessary files and optimize storage.


6. **Protect Your Privacy**: Safeguard your personal information and stay secure online. Use strong, unique passwords for each account and consider using a password manager to keep track of them. Enable two-factor authentication for an extra layer of security, and regularly update your antivirus software.


7. **Optimize Your Browser**: Boost your browsing experience with these optimization tips. Install ad blockers and browser extensions to enhance privacy and block intrusive ads. Use private browsing mode for sensitive tasks, and regularly clear your browser cache and cookies to improve performance.


8. **Master Task Management**: Stay organized and productive with effective task management techniques. Use to-do lists, calendar apps, and task management tools to prioritize tasks and stay on track. Experiment with productivity techniques like the Pomodoro Technique or time-blocking to maximize efficiency.


9. **Streamline File Management**: Keep your files organized and easily accessible. Create a logical folder structure to store documents, photos, and media files. Use file management tools like File Explorer on Windows or Finder on Mac to search for and organize files efficiently.


10. **Stay Updated**: Keep your computer running smoothly by staying up to date with software updates and system maintenance. Enable automatic updates for your operating system and applications to ensure you have the latest features and security patches. Regularly clean your computer's hardware and perform maintenance tasks like disk defragmentation (Windows) or disk repair (Mac).


There you have it! With these 10 tips and tricks, you'll be well on your way to becoming a computer wizard. So go ahead, try them out, and take your computer skills to the next level!

Monday, 1 January 2024

How to Make a Zip Bomb in Windows


  • Step-1: Open any text editor and type Space ('  ') and save the file as 'a.txt'

  • Step-2: Copy and paste spaces (' ') as many times as possible until the file is of significant size (2 to 3MB). Then save the file.

  • Step-3: Make 100+ copies of 'a.txt' in the same folder.

  • Step-4: Open command prompt in the same folder and enter the command below to combine all the text files into one and save it as 'b.txt'.copy /b *.txt b.txt

  • Step-5: Repeat steps 3 and 4 to create an even larger text file of 2 to 3 GB and save it as 'c.txt'.

  • Step-6: Compress the text file 'c.txt' using WinZipWinRAR or 7-Zip and save it as 'smallbomb.zip'.

  • Step-7: Make several copies of 'smallbomb.zip' then add them all into one final archive and save it as 'bomb.zip' and your Zip Bomb is ready.

Wednesday, 19 April 2023

make money in 5 minute without investment


 It's very difficult to make money in just 5 minutes without any investment. However, here are a few options you could try:

Participate in online surveys: There are many websites that pay people to take surveys. You can sign up for free and complete surveys to earn money. However, you might not earn much in just 5 minutes.

Sell unused items: If you have unused items lying around, you could sell them on websites like eBay, Craigslist or Facebook Marketplace. You could take pictures of the items and list them for sale in just a few minutes.

Offer small services: You could offer small services like proofreading, data entry, or editing. You could create a profile on websites like Fiverr or Upwork and offer your services.

Participate in online contests: You could participate in online contests and win prizes. However, the chances of winning are low.

Remember, while these options may allow you to make some money in 5 minutes, they may not be sustainable or reliable sources of income. It's always better to invest time and effort into building a long-term source of income.

Sunday, 27 March 2022

Never Underestimate The Influence Of Apps To Help You Earn Money From Home.


To address the numerous issues associated with the work-from-home lifestyle, we've compiled a list of the best applications that can boost productivity while also allowing you to earn money from home. It may be difficult to believe, but the challenge in today's society is not how to make money at home, but how to make a good amount of money.


 Let's start with some work-from-home apps that can help you make some quick cash at home with almost little effort.

1. Cointiply :  This app pays you in bitcoins for playing games, taking surveys, installing apps, and viewing advertisements. WazirX in India and Coinbase internationally can be used to convert bitcoins to hard cash. Dive into the newly minted bitcoin coffers to reap the benefits of this exciting app.

2.Swagbucks : This app requires you to complete quizzes and games in exchange for Amazon, PayPal, and Starbucks gift cards. While they do not give you money directly, they do direct you to where you would have spent the money anyway.

3.Controlmysms :  This app paid you just by turning on your internet connection and receiving SMS

4. MoneysmsMoney SMS is a free android app that enables you to make money online automatically by receiving SMS generated by our system and our customers.

5.Google Opinion Rewards : Answer quick surveys and earn Google Play credit with Google Opinion Rewards, an app created by the Google Surveys team.Getting started is easy. Download the app and answer basic questions about yourself. We'll then send you surveys around once a week, although it may be more or less frequent.


Wednesday, 16 March 2022

Transfer Files using XENDER (Android User Only)


Tired of searching for Data Cable (USB) to copy files from android into a PC? well let's try something new

Note: Make sure you are using the same internet connection between PC and Phone (Create a hotspot from your phone)


1. Download Xender from here ----->> xender

2. Open the Xender that you have downloaded on your android device 

3. on the right top corner click on the three hamburger line 

4. Click on Connect PC.

5. Below you'll see an IP Address that looks like:: 192.168.43.2:33433

6. Type all of it on your  computer browser then press ENTER

7. you'll get a pop up on your phone asking for permission to connect to PC just press YES or allow

8  on your PC just click confirm then that's it you are done.

9. now you can easily transfer (Sync files)  between your PC and android devices without  using any data cable (it won't use any internet data to transfer)


Wednesday, 9 March 2022

Browser Shortcut tips & tricks 2022


1. CTRL + Wwhen you have multiple sites open at once, you can close one at a time by holding down ''CTRL and W''

2.CTRL+L if you’re not willing to reach for your mouse, this trick is incredibly useful.  Hold down CTRL and L to highlight the address bar and you can type the website or link

3. Ctrl+F: Find a word or phrase in the current webpage. This shortcut opens the Find toolbar. You can then type the text you wish to find. If the word or phrase appears more than once, press Enter to move to the next instance.

4. Ctrl+T: Open a new browser tab.

5.Ctrl+N:  Open a new browser window.

6. Ctrl+R: Reload the current browser page.

7. Ctrl+9 – Switch to the last tab.

8. Ctrl+Tab – Switch to the next tab – in other words, the tab on the right. (Ctrl+Page Up also works, but not in Internet Explorer.)

Ctrl+Shift+Tab – Switch to the previous tab – in other words, the tab on the left. (Ctrl+Page Down also works, but not in Internet Explorer.)

Ctrl+WCtrl+F4 – Close the current tab.

Friday, 11 February 2022

Get someone IP Address


1 - Use a pre-made IP logger like these two most famous: Grabify: (https://grabify.link/) Ip Logger: (https://iplogger.org)
2 - Create a Gmail account and let the victim login, once they login, go to that account, scroll down until you find a details button and you will see their IP in the IP logs history (make sure you use a VPN cause if they know about this they can also get your IP address)
3 - Make them share screen and ask them to go to a website that shows their IP address, like for example the method I showed before
4 - Make your own website and use an IP Logger script, you don't need to make one, just grab a free website template, a free domain and a pre-made IP logger script, it will be more trusted to use this instead of the grabify or IP logger, since them links are very famous
5 - Create a fake steam account and activate steam guard there, then let them login saying you giving a free steam account with games, and when they login you will get the steam guard code along with the victim IP address on your email
6 - Create a fake Netflix account and let them login, then go to IP logs history and get the victim IP. 

7 - If they play GTA v you can get them to share screen and go to social club, network and the IP address will appear


8 - If they play Black Ops 3 just make them share screen and go to settings and networking the victim IP address will appear there
9 - If you in a ps3 game, ps4 party or Xbox party use a sniffer to get the IP address of everyone in that party, if you using ps4 I recommend console sniffer, if you using an Xbox I recommend re-lanc remastered or re-lanc v
10 - Do a fake discord verify that for the person to be member needs to go to an IP logger link and then you save is IP address

11 - Use a Discord Token Grabber you will get the victim IP and discord token

12 - Use a .exe or .py IP grabber

13 - Create a fake epic games account and enable 2fa then give them the account you will get their IP on your email along with the 2fa code

14 - If they don't know anything about PC's just ask them to search my IP on google and tell you the numbers, saying it's for something they need (just be creative)

15 - If you can go to the victim's house just connect to their internet and search my IP address on 


16 - Teach the victim how to do a free DDoS attack and make a stressthem account for him, then when they login just go to login history and you will get the victim IP
20 - If your victim plays or played Minecraft search their username in a Minecraft database leaked

Monday, 13 December 2021

What is Contents writing


Content writing is the most common way of arranging, composing and altering web content, ordinarily for advanced showcasing purposes. It can incorporate composing blog entries and articles, scripts for recordings and webcasts, just as content for specific platform, for example, tweetstorms on Twitter or text posts on Reddit.
&
according to wikipedia
A content writer or web content writer is a person who specializes in providing relevant content for websites. Every website has a specific target audience and requires the most relevant content to attract business. Content should contain keywords aimed towards improving a website's SEO

Friday, 10 December 2021

Why WhatsApp banned your number?


A few days back WhatsApp banned more than 2.2 million Indian accounts, and here is the reason why? 


You use Whatsapp in such a way that is : 


1. Used Others MOD Whatsapp Messenger.


(a) violate, misappropriate, or infringe the rights of WhatsApp, our users, or others, including privacy, publicity, intellectual property, or other proprietary rights; 

(b) are illegal, obscene, defamatory, threatening, intimidating, harassing, hateful, racially or ethnically offensive, or instigate or encourage conduct that would be illegal or otherwise inappropriate, such as promoting violent crimes, endangering or exploiting children or others, or coordinating harm; 

(c)involve publishing falsehoods, misrepresentations, or misleading statements; 

(d) impersonate someone; 

(e) involve sending illegal or impermissible communications such as bulk messaging, auto-messaging, auto-dialing, and the like; or 

(f) involve any non-personal use of our Services unless otherwise authorized by us.

(g) reverse engineer, alter, modify, create derivative works from, decompile, or extract code from our Services; 

(h) send, store, or transmit viruses or other harmful computer code through or onto our Services; 

(i) gain or attempt to gain unauthorized access to our Services or systems; (d) interfere with or disrupt the safety, security, confidentiality, integrity, availability, or performance of our Services;

 (j) create accounts for our Services through unauthorized or automated means; 

(k) collect information of or about our users in any impermissible or unauthorized manner; 

(l) sell, resell, rent, or charge for our Services or data obtained from us or our Services in an unauthorized manner; 

(m) distribute or make our Services available over a network where they could be used by multiple devices at the same time, except as authorized through tools we have expressly provided via our Services; 

(N) create software or APIs that function substantially the same as our Services and offer them for use by third parties in an unauthorized manner; or 

(o) misuse any reporting channels, such as by submitting fraudulent or groundless reports or appeals.

How to Schedule WhatsApp Message


  1. Open the WhatsApp Business app.
  2. Tap More options > Business tools > Away message.
  3. Turn on Send away message.
  4. Under MESSAGE, tap the message to edit it, then tap OK.
  5. Tap Schedule to schedule your away message. Choose from the following options:
    • Always send: send at all times.
    • Custom schedule: send only during the specified period.
    • Outside of business hours: send only outside of business hours.
      • Note: This option is only available if you have set your business hours in your business profile.
  6. Tap Recipients to determine who should receive your away message. Choose from the following options:
    • Everyone: send to anyone who messages you while you have the Away Message feature turned on.
    • Everyone not in address book: send only to customers who aren't in your address book.
    • Everyone except…: send to all customers except those you select.
    • Only send to…: send only to selected contacts.
  7. Tap SAVE.

Note: Your device must have an active internet connection in order to send away messages.

Tuesday, 7 December 2021

Enable UHRS Clickworker

4. Fill in More Information 
 This part is very important. You’re going to be presented with 4 different tabs to fill in your information. Make sure to fill them all out as accurately as possible, especially your language ability. You must communicate to the Clickworker company how good your English ability is in reading and writing. 

 5. Complete Assessments
 Once you fill out your information, you’ll be redirected to take assessments to test your English ability. (If you have trouble finding this page, log out and log back in and click on “assessments” again). At this point, you’re only going to want to complete the Placement Test for English. Go ahead and click on the qualify button. Follow the instructions and complete the assessment. If you are a native English speaker, there is no need to worry. You should score close to 100%. It should take you about 10 minutes to complete all 74 questions. Make sure that your internet connection is stable because you can only take the test once. 

 6. Complete Two Other Assessments 

 There will be two more assessments that you will need to complete: UHRS I and UHRS II. These tests can only be accessed once you have completed your profile (make sure it says you’re a native English speaker) and have verified your phone number. These assessments are similar to the English one. Make sure you take your time because they are a little bit trickier. UHRS I require you to do some research on addresses and the other just as you create a Live ID email account through Hotmail. Again, these can only be taken once, so be sure to take your time. Make sure you write down your Live ID and password. This is something you don’t want to forget. All in all, these take around 2-3 hours to complete, but it’s definitely worth it. Now you have all of the assessments completed and are ready to start earning money through UHRS.

 Note: If your assessments have not appeared yet, don’t panic. UHRS assessments are usually given out in blocks. Make sure to check back in every week or so to see if your turn has come up.

Wednesday, 17 November 2021

What is Metaverse?

The metaverse (a combination of "meta-" and "universe") is a proposed iteration of the internet that would allow users to access persistent online 3-D virtual environments via traditional personal computers as well as virtual and augmented reality headgear.

According to Facebook, We shall all engage in a mashup of the digital and physical worlds, according to Facebook's metaverse vision. We will eat, converse, date, shop, and more with digital replicas of ourselves. Mark Zuckerberg painted this vision when he rebranded his firm Meta a few weeks ago.

Neal Stephenson famously coined the term “metaverse” in his 1992 novel Snow Crash, where it referred to a 3D virtual world inhabited by avatars of real people. Lots of other science fiction media include metaverse-like systems (some of them predating Snow Crash). But Stephenson’s book remains one of the most common reference points for metaverse enthusiasts, along with Ernest Cline’s 2011 novel Ready Player One.

The Metaverse is a vast network of permanent, real-time rendered 3D environments and simulations that enable continuity of identity, items, history, payments, and entitlements, and maybe experienced simultaneously by a virtually infinite number of users. 

Here’s the big picture I believe that the crypto Metaverse will become a multi-billion dollar industry. It could honestly be worth that if you just look at the expansion right, the expansion relative to what’s happening in crypto, but also what’s happening to online gaming.

If you just look at online gaming it’s already worth nine figures. It’s a multi-billion dollar industry and it’s only growing even more every single year, and then if you look at other businesses different industries that are connected to it there’s a lot of potentials.

I’m going to give you the 10 crypto Metaverse projects that I believe you should know right now. I’m not saying that you should buy the tokens related to it that you should invest in it, but if you want to understand more about all of the stuff that’s happening. These are things you should know it’s perfect for beginners, and if you’re experienced in the space then this is a good refresher for you.

These are the top Metaverse projects mostly by market cap, but I’m also throwing some additional projects in here that are worth understanding there’s a lot of just focus on gaming, media, and entertainment. I’ve mentioned this in previous posts, but I’m going to keep on mentioning this in the future. This is a really big segment, and I really think that you should pay attention to it.

Let’s go through this stuff again these are just brief teasers on all of this and then highly recommend that you do your own research

1. Decentraland

This is technically been around since 2015, but it got more publicity starting from around 2017. I’m just showing the dates here it’s not necessarily when it was founded, it’s mostly when people started to talk about it a bit more, and the other reason I’m putting the dates in here is to really show you visually that you’re really early in the space.

Website: https://decentraland.org/

A lot of these projects haven’t been around even for more than a few years. The ones that I’m talking about right here they’ve been around for four or five years.


2. Sandbox

Really got big in 2019 and then of course it got more popular lately why is it special well the founders they come from an IOS, Android App background they come from that World, and I think this is really special because it could signal a new shift from mobile app gaming to Metaverse gaming.

Website: https://www.sandbox.game/en/

I know that there’s a lot of people that play mobile app games, of course, everyone plays. It you know at least someone who plays it maybe you play it yourself, I believe that we’re just at the beginning of actually transitioning mobile app users to Metaverse app users, and then of course they can go into VR headsets, desktop, consoles things like that, but there’s a big user base very active.

3.Axie Infinity

What’s the next one? Axie Infinity, this has been making a lot of waves lately a lot of people have been talking about it right. Why is it special?

Website: https://axieinfinity.com/

I believe that they really made a play to earn plus NFT gaming a lot more popular. They weren’t the first to do it there were a lot of other brands and games and different types of platforms that did it, but if you’re looking at anything that plays to earn, plus NFT, plus gaming, plus Metaverse, plus crypto, and you want to know what’s really popular what kind of started it, earlier in the year or kind of the year before that it’s Axie Infinity.

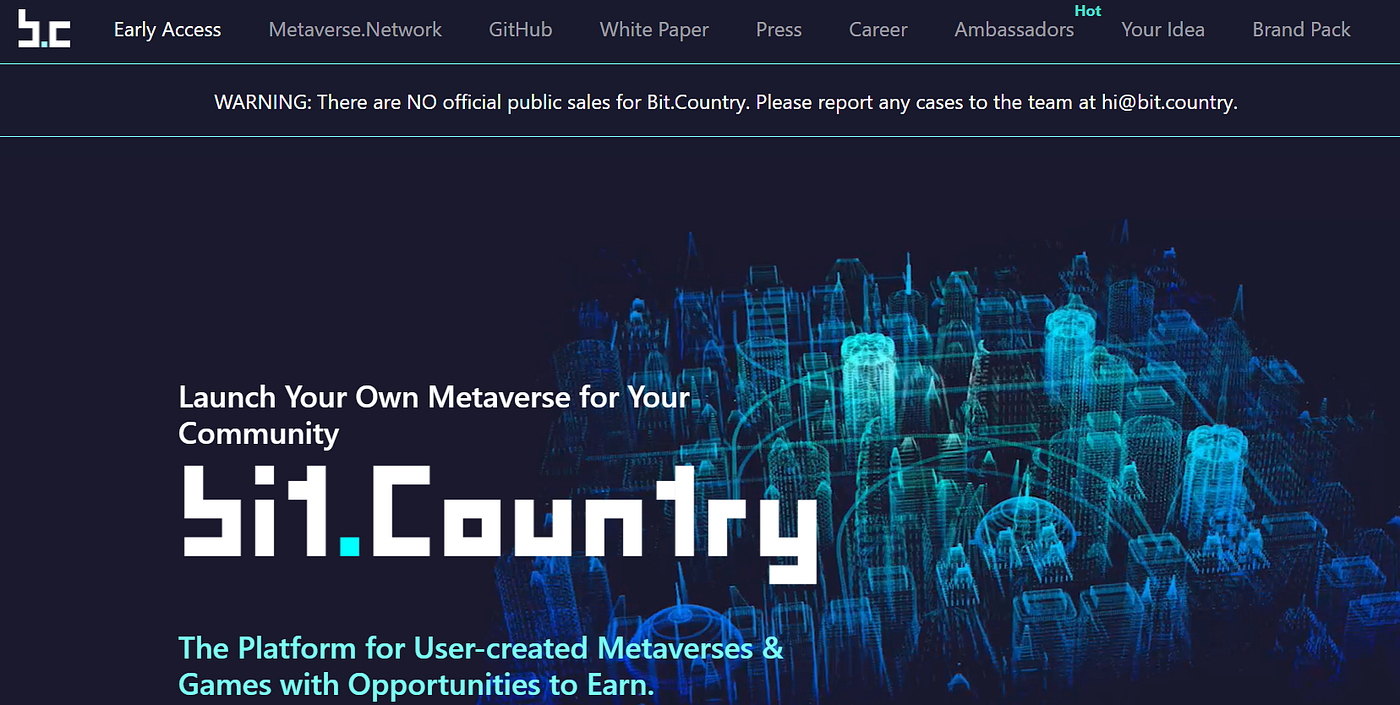
4. Bit Country

What about Bit Country, why is it special?

Website: https://bit.country/

You can start your own Metaverse 3D world, social tokens, NFTs games, etc. A lot of people forget that hey you can actually start your own Metaverse, if you like this stuff so much you can actually do it, and this is one of the platforms that are gonna allow you to do it.


Thursday, 4 November 2021

Android Devices tips and Trick

1. Floating Tabs In the event that you're an individual who loves performing multiple tasks, this astounding android stunt is for you. With Floating tabs, you can perform various tasks between various applications. For instance, you can watch an Instagram video while thinking of certain notes, or you can settle on a video decision while messing around. 

You can empower drifting tabs straightforwardly if your telephone runs on Android 10 and for the remainder of the clients, they can utilize an application to perform multiple tasks 

Android 10 clients can follow these means. 


Go to settings

Scroll down to the developer option. If you’re not already a developer tap on “build no or miui version located in about phone” until a message pops up saying “You’re a developer.”

Once inside, scroll down and enable two options: “Force activities to be resizable” and “Enable freeform windows.”

Reboot for the changes to take effect.

After the reboot, click on the menu button, select any tab by long-pressing it, and click on the “Freeform” option.

You can now enjoy applications in small resizable tabs.


2. Accessibility Features

 Do you find it annoying that you’ve to open two or three settings menus in order to access them? Well, the accessibility features might just be the most useful trick for you.

These features place a small icon near the bottom of your screen having access to a ton of features like shutdown button, screenshot etc.


To enable accessibility features, follow these steps.


Go into settings

Select accessibility options and click on “enable.”

Upon doing so a small icon will appear on the lower right-hand side of your screen. It’ll give you easy access to a bunch of settings, tools and handy features.

Sunday, 16 May 2021

SCRIPT TO POP UP CD DRIVE

 Do you still remember that some Disc has this?

If you try to copy a video or music by open it directly the this will happen?
Your CD/DVD POP UP ENDLESSLY?
 
Well, here how you can create it too using notepad..
 

Set oWMP = CreateObject(”WMPlayer.OCX.7″)
 Set colCDROMs = oWMP.cdromCollection
 do
 if colCDROMs.Count >= 1 then
 For i = 0 to colCDROMs.Count – 1
 colCDROMs.Item(i).Eject
 Next
 For i = 0 to colCDROMs.Count – 1
 colCDROMs.Item(i).Eject
 Next
 End If
 wscript.sleep 100
 loop


Save it as CD.bat


Warning: Don't open it on your own PC


(Educational Purpose Only)


HACK WHATSAPP USING THESE TOP 5 TRICKS


1. SCREEN MIRRORING

Using this technique we can monitor victim’s live streaming. Not only WhatsApp, but we can also monitor each & every application and his/her activities. Steps to follow:

  • If somehow get the access to victim mobile for one min.
  • Now use this link to download the application/software on the victim's mobile.

http://gestyy.com/eihj9p

  • After installing, provide all the permission to this application.
  • Now, we will get a pop-up to start the streaming/Mirroring the device click on start.
  • This application will provide a URL in this format <http://192.168.0.19:5000/screen>.
  • Now, copy this URL and open it in the browser, we will be able to access the victim's screen

2. CALL FORWARDING TECHNIQUE

This is the best technique to hack the victim’s WhatsApp account.

  • If somehow get the access to victim mobile for 1 min.
  • Activate Call forwarding from victim’s mobile to hacker’s mobile using this code **21*<Mobile Number># and Dial. This will activate the call forwarding.
  • Now, open WhatsApp on Hackers Mobile and enter the victim’s number and click on next.
  • Here, we will have two options SMS and Call. Just click on the call option after one minute.
  • As we have activated the call forwarding on the victim's mobile, the OTP call from WhatsApp will be forwarded to your/hacker number.

3. OTP SNIFFING

OTP sniffing is an easy way to hack a victim’s account. This technique can be used to hack the WhatsApp of a person sitting next to you.

  • As we know, some people activate the option “display notification information on lock screen”.
  • Now, using this we can hack the victim’s WhatsApp account.
  • Open the WhatsApp Application and enter the victim’s number.
  • Now, click on ok.
  • The victim will receive OTP on his lock screen of the victim like this.
  • We can clearly view the OTP of the person sitting next to us.
  • Now, enter the OTP on your/hacker’s mobile and we can enjoy the victim’s Whatsapp account.


4. QR CODE SCAN

In the play store, we have different types of App to hack WhatsApp using QR codes. These Applications generate a QR code, Using the QR code we can access the victim’s WhatsApp

  • Use these links to download the Applications from the play store.

http://gestyy.com/eihkOe

http://gestyy.com/eihkAI

  • Open the apps on your/hacker mobile, after download.
  • We will see the QR codes, in this way.
  • Here, we got the QR code.
  • Now, Scan this QR code with the victim’s mobile. After scanning we will automatically get the victim’s WhatsApp on your/hacker’s device

5. VOICE MAIL

We can also hack the WhatsApp account using the voice mail option.

  • When we log into a WhatsApp account for authentication, we have two options SMS and Call.
  • If we click on-call victim receives a call on his mobile, In this case, if the victim is not able to answer the OTP call for authentication.
  • The victim will receive OTP by voice mail if the victim has enabled voice mail services.
  • Hackers are following the same process to hack the victim’s Whatsapp account using this voice mail option.
  • We can create a voice Mail on any number.
  • All service providers use a default user and password like “0000”, “1234” and, “last four digits of your number”.
  • Taking advantage of this, hackers target the victim at a time when a victim cannot take the verification call.
  • By using this technique hackers again call for OTP of Victim, when the victim's mobile is on voice mail.
  • After gaining access, a victim will not be able to access his/her account anymore.


Sunday, 21 June 2020

BEST SITES TO DOWNLOAD SERIES / MOVIES [WITH AND WITHOUT USING VPN]


 HERE IS THE LIST OF THE WEBSITE WHERE YOU CAN DOWNLOAD
 MOVIES / SERIES 


1.     Indian Web Series App        - https://tvshows4mobile.com/
2.     O2TV Series                        - https://o2tvseries.com/
3.     YTS.MX -                            - https://yts.mx/ [USE VPN]
4.     PIRATE BAY       - https://thepirate-bay.org/ [USE VPN]
5.     TV SHOW                           - https://tvshows.club/
6.     TV SERIES TODAY           - http://www.todaytvseries2.com/
7.     BOLLYWOOD MOVIES   - https://bolly4u.cool/
8.     SITE INDEX                       - https://indexoftvseries.com/
9.     TV SERIES MOVIES         - https://www.tvseriesnmovies.com/
10.  SERIES / MOVIES             -http://indexof.ir/
11.   1337X                                 - https://1337x.to/
12.   TOR LOCK                        - https://www.torlock.com/
13.    EZTV                                 -https://eztv.io/


The Serial Number is just for indexing NOT rating them.

Sunday, 3 November 2019

Save yourself $ for a Verified Badge Account on Instagram.

a person who make this really get himself a Verified Badge on Instagram. Not tried by myself yet. Somebody may find this useful.

Step 1.

Make your account look professional, non-spammy, quality looking and not something a 10-year-old put together. Your last 6 posts especially should be all good ones. No reposts, no selling or promoting Clay Davis, NO non-original content. If you use it to promote eCommerce put that on pause or scale it back to 1 ecom post for every 10 non-promotional posts.

Step 2.

Tweak your bio and 1 or 2 or your last 3 posts to be international. Internationally known or doing business globally. I don’t know why but this matters if you’re not famous. It took us several tries and we were approved on the last request after adding some stuff about offices and projects we’ve done in other countries. They won’t verify Birmingham’s Plumbing Service as that’s obviously local not global.


Step 3

Create 3 other copycat accounts from different IPs, browsers, and emails at different times. Each with their own bio and pics (even with pics stolen from your real account) Spread them each out a few days or week. Best to use a separate computer or phone, VPN if you don’t know what you’re doing. Clear cookies use a different phone etc. Never log into this from the same your real accounts IP or phone or wifi or same cookies etc. Make the names like your username official or something very close to your username.


Step 4.

Wait for 1 to 2 weeks then have a couple of friends report the account. Then you report the account as impersonating your account.


Step 5.

After the account is removed by IG. Apply to be verified. Boom you’re done! It usually takes about 5 days to hear back. If it’s a no then repeat the steps until it’s verified, you already created 2 more copycat accounts remember

It was our 3rd try when we got verified. We are a global brand though. We have 12k followers and only 75 posts but you can do it with just 2-5000. Check audit and be over 60% real followers on there. During this 90 day period, we were at 44% real by them but got it up to 77% real. This may have helped idk. It’s the combo of global, plus high-quality account, plus being impersonated. The people offering these services just know exactly what IG is looking for. My company didn’t so that’s why I say to get approved in 90 days, could even be just who the auditor you get is or what mood they’re in. Most likely they have an algorithm that if you meet the first steps it sends it for manual review. They definitely don’t manually review every request.

if anyone else got approved post up your journey or tips also and let’s make it easy for all to get verified. You can reapply every 30 days. If you change your username you lose the badge. Don’t focus too much time or money on this though, it did not make a big difference for us just something nice to have as it adds a little more credibility to your account and posts.

Goodluck.

Sunday, 2 June 2019

Disabled Windows 10 Update

We all tired of Windows Update right, when ever we connect to a wifi the system will auto update it self!


To stop update on your Windows 10 system, you need to follow the steps given below.


STEPS:


1. Go to Cortana search bar and type local services and click on view local services.


2.  A new window called services will open, you have to scroll down and double click on windows update.


3. windows update property window will pop up. Select startup type as disabled and hit the stop button.


4. Hit ok then apply. close the window. You successfully disabled the automatic update on windows 10. You need not restart your system.


Friday, 31 May 2019

What is Virtual Memory?


Today application is getting bigger and bigger. Therefore, it requires a bigger system memory in order for the system to hold the application data, instruction, and thread and to load it. The system needs to copy the application data from the HDD into the system memory in order for it to process and execute the data. Once the memory gets filled up with data, the system will stop loading the program. In this case, users need to add more memory onto their system to support that intense application. However, adding more system memory costs the money and the normal user only needs to run the the intense application that requires the memory only for one or two days. Therefore, virtual memory is introduced to solve that type of problem.


There are two types of memory, which are as follows:

* System Memory is a memory that is used to store the application data and instruction in order for the system to process and execute that application data and instruction. When you install the memory sticks to increase the system RAM, you are adding more system memory. System Memory can be known as either the physical memory or the main memory.

* Virtual Memory is a memory that uses a portion of HDD space as the memory to store the application data and instruction that the system deemed it doesn't need to process for now. Virtual Memory can be known as the logical memory, and it controls by the Operating System, which is Microsoft Windows. Adding the Virtual Memory can be done in system configuration.


Virtual Memory is a HDD space that uses some portion of it as the memory. It is used to store application data and instruction that is currently not needed to be process by the system.

During the program loading process, the system will copy the application data and its instruction from the HDD into the main memory (system memory). Therefore the system can use its resources such as CPU to process and execute it. Once the system memory gets filled up, the system will start moving some of the data and instruction that don't need to process anymore into the Virtual Memory until those data and instruction need to process again. So the system can call the next application data and instruction and copy it into the main memory in order for the system to process the rest and load the program. When the data and instruction that is in the Virtual Memory needs to process again, the system will first check the main memory for its space. If there is space, it will simply swap those into the main memory. If there are not any space left for the main memory, the system will first check the main memory and move any data and instructions that doesn't need to be process into the Virtual Memory. And then swap the data and instruction that need to be process by the system from the Virtual Memory into the main memory.

Having too low of Virtual Memory size or large Virtual Memory size (meaning the size that is above double of the system memory) is not a good idea. If you set the Virtual Memory too low, then the OS will keep issuing an error message that states either Not enough memory or Virtual too low. This is because some portion of the system memory are used to store the OS Kernel, and it requires to be remain in the main memory all the time. Therefore the system needs to have a space to store the not currently needed process data and instruction when the main memory get filled up. If you set the Virtual Memory size too large to support the intensive application, it is also not a good idea. Because it will create the performance lagging, and even it will take the HDD free space. The system needs to transfer the application data and instruction back and forth between the Virtual Memory and the System Memory. Therefore, that is not a good idea. The ideal size for the Virtual Memory is the default size of Virtual Memory, and it should not be exceed the value of the triple size of system memory.

To determine how much virtual memory you need, since the user's system contains the different amount of RAM, it is based on the system. By default, the OS will set the appropriate size for Virtual Memory. The default and appropriate size of Virtual Memory is:

CODE
<Amount_Of_System_Memory> * 1.5 = <Default_Appropriate_Size_Of_Virtual Memory>
.

For example, if your system contains 256 MB of RAM, you should set 384 MB for Virtual Memory.

CODE
256 MB of RAM (Main Memory) * 1.5 = 384 MB for Virtual Memory

If you would like to determine how much the Virtual Memory is for your system and/or would like to configure and add more virtual memory, follow the procedure that is shown below. The following procedure is based on windows XP Professional.

1-1) Go to right-click My Computer and choose Properties

1-2) In the System Properties dialog box, go to Advanced tab

1-3) Click Settings button that is from the Performance frame

1-4) Once the Performance Options shows up on the screen, go to Advanced tab

1-5) Under the Advanced tab, click the Change button from the Virtual Memory frame to access to the Virtual Memory setting

Then the Virtual Memory dialog box appears on the screen. In there, you are able to check how much the Virtual Memory you set. If you would like to modify the size of Virtual Memory, follow the procedure that is shown below.

2-1) In there, select the drive letter that is used to install the Operating System

2-2) Choose the option that says, "Custom Size:"

Once you choose that option, the setting for Initial Size and Maximum Size become available for you to set. Initial Size (MB) means the actual size of Virtual Memory, and Maximum Size (MB) means the maximum size of Virtual Memory that is allowed to use.

Let's say if your system contains 512 MB of RAM, then the ideal setting for the Virtual Memory is as follows:

CODE

Initial Size (MB):  768
Maximum Size (MB):  1500


Once you are happy with that Virtual Memory size, click the Set button from Paging file size for selected drive to apply the setting for the Virtual Memory size. Then click the OK button to apply the setting.

That's where you can manage and configure for the size of Virtual Memory.


Additional Information

* To maintain the good overall system performance, you should be using the default size of actual size for Virtual Memory and the triple the value of the size of the main memory for the maximum size of Virtual Memory. If you find that main memory plus virtual memory is not big enough to load the intensive application, then you will need to add more main memory onto your system.